
Kansas City Metro
Siding Installation & Repair in Kansas City
Whether you need a full exterior re-sided or just a damaged section replaced, we handle both — new siding installs and repair work, matched and sealed so it holds up through KC's weather.
Repairs often go hand in hand with wood rot removal underneath, and we always check for that before closing anything back up. That's the part that matters: siding is a water management system, not decoration. Every piece of it exists to move water down and out, and a repair that looks fine but interrupts that path causes damage you won't see for years.
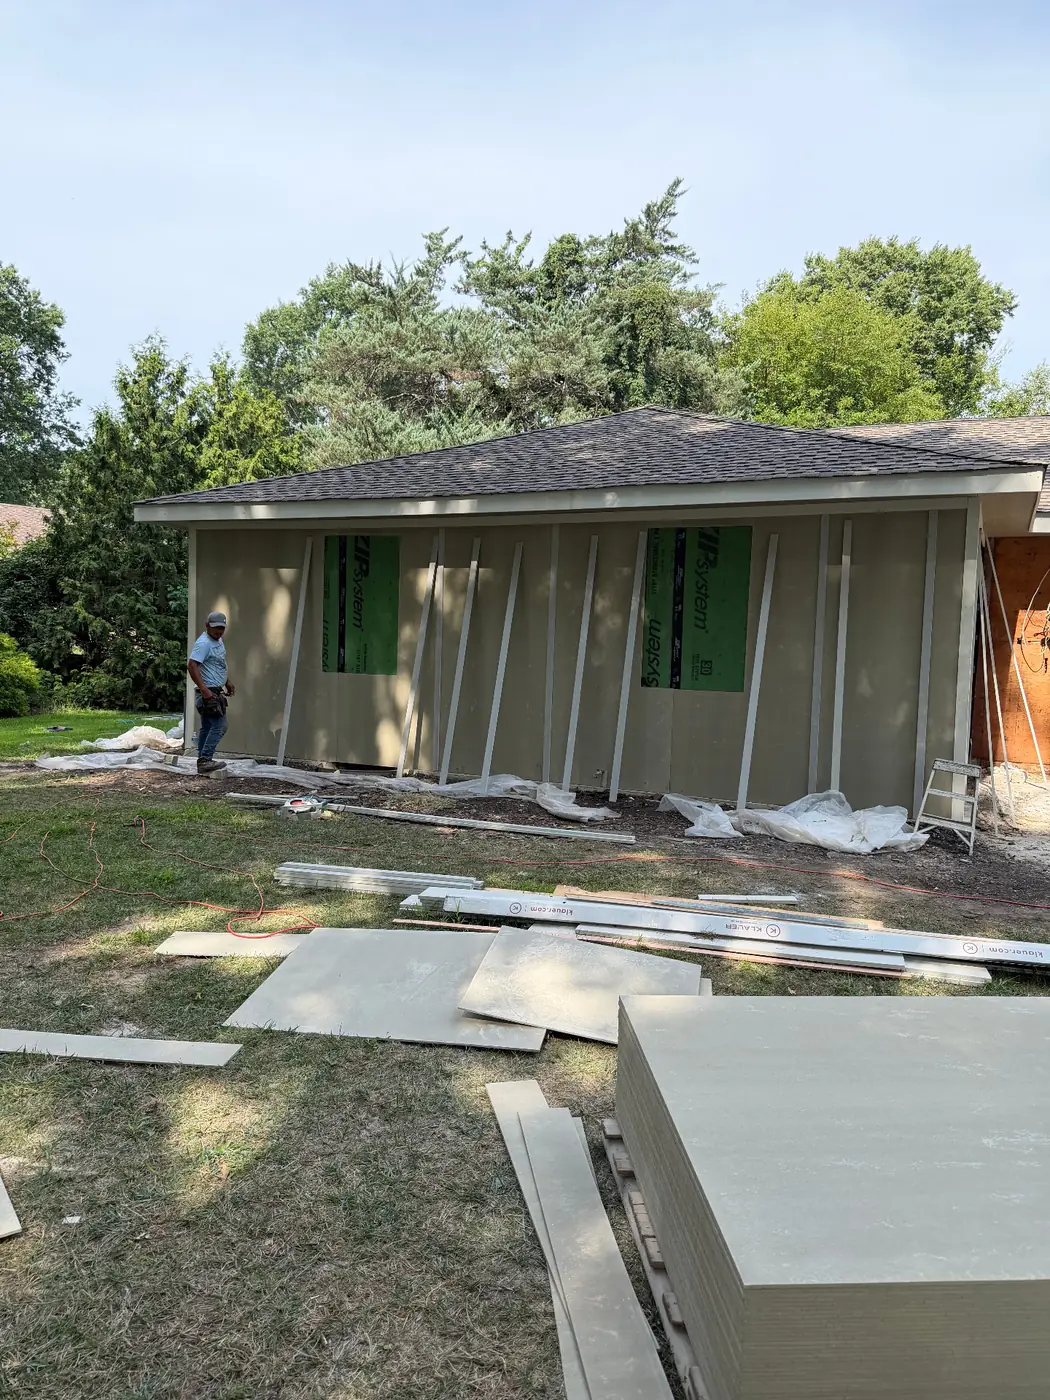
How the work runs
- 1
Inspect & scope
Damage assessed, water source identified, repair-vs-replace decided with you.
- 2
Remove siding
Boards off carefully so undamaged material and trim can be reused where possible.
- 3
Assess sheathing & framing
Soft and delaminated material found and documented with photos.
- 4
Rot repair
Cut back to solid material, replaced with new primed lumber.
- 5
Barrier & flashing
Weather barrier repaired and lapped, flashings installed or corrected.
- 6
Install siding
Correct fastening, staggered joints, clearances at grade and roof, ends primed.
- 7
Seal, paint & clean up
Vertical joints sealed, drainage left open, elevation painted, site cleared.
Repair or replace — how I decide with you
Damage confined to a few boards on one elevation — impact damage, a section that stayed wet under an overflowing gutter, woodpecker or storm damage — is usually a repair. When failure is spread across multiple elevations, when boards are splitting and cupping generally rather than locally, or when opening one area reveals that moisture has been getting behind the siding for a long time, a section-by-section approach turns into chasing the problem.
I'd rather show you what I'm seeing and let you decide with the real picture. We wrote a longer piece on this decision for Northland homeowners: siding repair vs. full replacement.
What we find when siding comes off
Once boards are off, the sheathing tells the story. Dark staining, soft spots, delaminated OSB, and rusted fasteners all point to how long water has been getting in and where from. Common sources on KC homes are simple and repeatable: gutters overflowing behind fascia, missing or reversed flashing above a window or a deck ledger, a kickout flashing that was never installed where a roof meets a wall, and siding installed in ground contact so it wicks moisture up.
Anything soft gets cut back to solid material and replaced — that's wood rot repair, and on siding work it's a normal part of the job rather than an exception. Framing gets checked, not just sheathing. Then the weather barrier gets repaired or replaced and lapped correctly, flashings get installed or corrected, and only then does new siding go on.
This is the step that separates a repair that lasts from one that hides the problem. Nailing new siding over wet sheathing looks identical from the street on day one and identical to a failure two years later.
Installation details that decide longevity
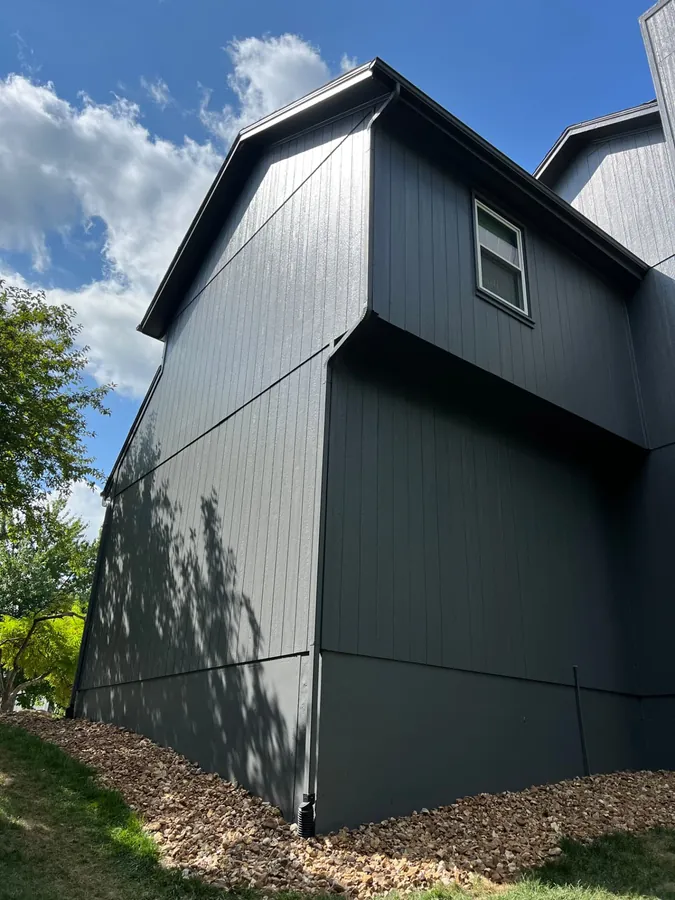
New siding gets fastened to framing at the right spacing, with fasteners driven snug rather than crushed tight — siding needs to move with temperature and moisture, and over-driven nails cause the splits and buckles people blame on the material. Butt joints get staggered and backed, and joints are kept away from the worst water paths where the layout allows.
Clearances get respected: siding held up off roofing and grade rather than sitting in contact with either, gaps at trim and penetrations sized for sealant to actually work. Cut ends of wood siding and trim get primed before installation, including the end grain, because end grain drinks water faster than any face on the board.
Then flashing and sealant, in the right roles: flashing sheds water by lapping and gravity, sealant fills a joint that flashing can't. Sealant used as a substitute for flashing fails, always. Vertical joints get sealed; horizontal drainage gaps under laps stay open so the wall can drain and dry.
Matching existing siding, and finishing
On a repair, matching matters — profile, exposure, and texture. Board-and-batten, lap siding, cedar shakes, and fiber cement all have their own reveal and shadow line, and a patch with the wrong exposure is visible from the street even after paint. Where an exact profile is no longer made, the honest answer is sometimes to replace a larger continuous area so the transition lands at a natural break instead of mid-wall.
Everything new gets primed and painted, and the repaint is planned so the patch doesn't read as a patch. On a spot repair that usually means coating the full elevation rather than the boards alone, because a repainted rectangle in the middle of a faded wall stands out more than the damage did. That's a conversation to have during the quote, not after.
Timeline and what to expect day to day
A section repair is often one to a few days, depending on how much rot turns up behind it. A full re-side is a multi-week project on most homes and includes days where a wall is open — which is why the weather forecast drives the schedule, and why we don't open more wall than we can dry-in the same day.
Expect noise, a dumpster or debris staging area, and some access disruption around the elevation being worked. Landscaping near the wall gets protected or, where necessary, temporarily tied back. Gutters and downspouts sometimes have to come off and go back on. I'll tell you which elevation we're on each day so you know which windows and doors will be blocked.
What I check before I call it done
No soft material left anywhere behind the new siding. Weather barrier lapped correctly, flashings in place at windows, doors, decks, and roof-to-wall transitions. Fastener spacing and depth consistent. Clearances at grade and roofing maintained. Butt joints tight and staggered. Drainage gaps open, vertical joints sealed.
Then the visual: profile and exposure matching across the transition, paint coverage on end grain and edges, gutters and downspouts reinstalled and draining away from the wall, and the site cleaned of nails and offcuts. We walk it together, and I'll show you photos of what was behind the wall — that's the part you paid for and the part you can't see anymore.
Siding repair and replacement in Lee's Summit
Lee's Summit has a mix of older and newer homes, and siding problems look different in each. I repair and replace siding on homes across Lee's Summit, including storm-cracked panels, warped or soft boards, and siding that no longer matches after earlier repairs. Every siding repair includes a check under the damaged board for moisture or rot before anything is closed back up, and the repainting is done by the same crew. If you're in Lee's Summit and not sure whether you need a repair or a full replacement, call 913-704-4418 for a free walkthrough.
To see the full range of what we do there, here's our work on painting and repair in Lee's Summit.
Before I call it done
- No soft sheathing or framing left behind new siding
- Weather barrier lapped correctly; flashing at windows, decks, and roof-to-wall
- Fasteners snug not crushed; joints staggered and backed
- Clearance kept at grade and roofing; cut ends and end grain primed
- Profile and exposure match across the repair transition
- Gutters reinstalled and draining away; site cleared of nails and offcuts
Where we do this work
Siding Installation & Repair across the Kansas City metro, with most projects in Johnson County KS, the Northland, and Lee's Summit MO.
Other services
Common questions
Both. Full re-siding projects and single-section repairs, matched and sealed so the repair holds up rather than just looking closed.
Localized damage on one elevation is normally a repair. When boards are failing across multiple elevations, or opening one area shows long-term moisture behind the wall, a full replacement usually makes more sense than chasing the same problem with repeated repairs.
Always, before anything gets closed back up. Sheathing and framing get checked, soft material gets cut out and replaced, and I photograph it so you can see what was behind the wall.
Usually — profile, exposure, and texture all get matched. When a profile is no longer made, replacing a slightly larger continuous area so the transition lands at a natural break looks far better than a mismatched patch mid-wall.
Not if the elevation is repainted rather than just the new boards. A fresh rectangle on a sun-faded wall stands out; a full elevation blends. We'll decide that during the quote.
We only open what we can dry in the same day, and the schedule follows the forecast. Section repairs are typically one to a few days; a full re-side runs into weeks on most homes.
Ready to bring your color to life?
Tell me about the project and I'll come walk it with you — no pressure, no sales pitch.